WiFi network configuration
1、Install APP
Android users search"YahboomRobot" in Play Store or enter tutorial link on the homepage to download APP.
iOS users search"YahboomRobot" in App Store to download APP.

2、Connect network
Note: We need to enter the desktop of the Raspberry Pi first and turn off the hotspot mode before we can configure the APP WiFi network. The steps to turn off are as follows:
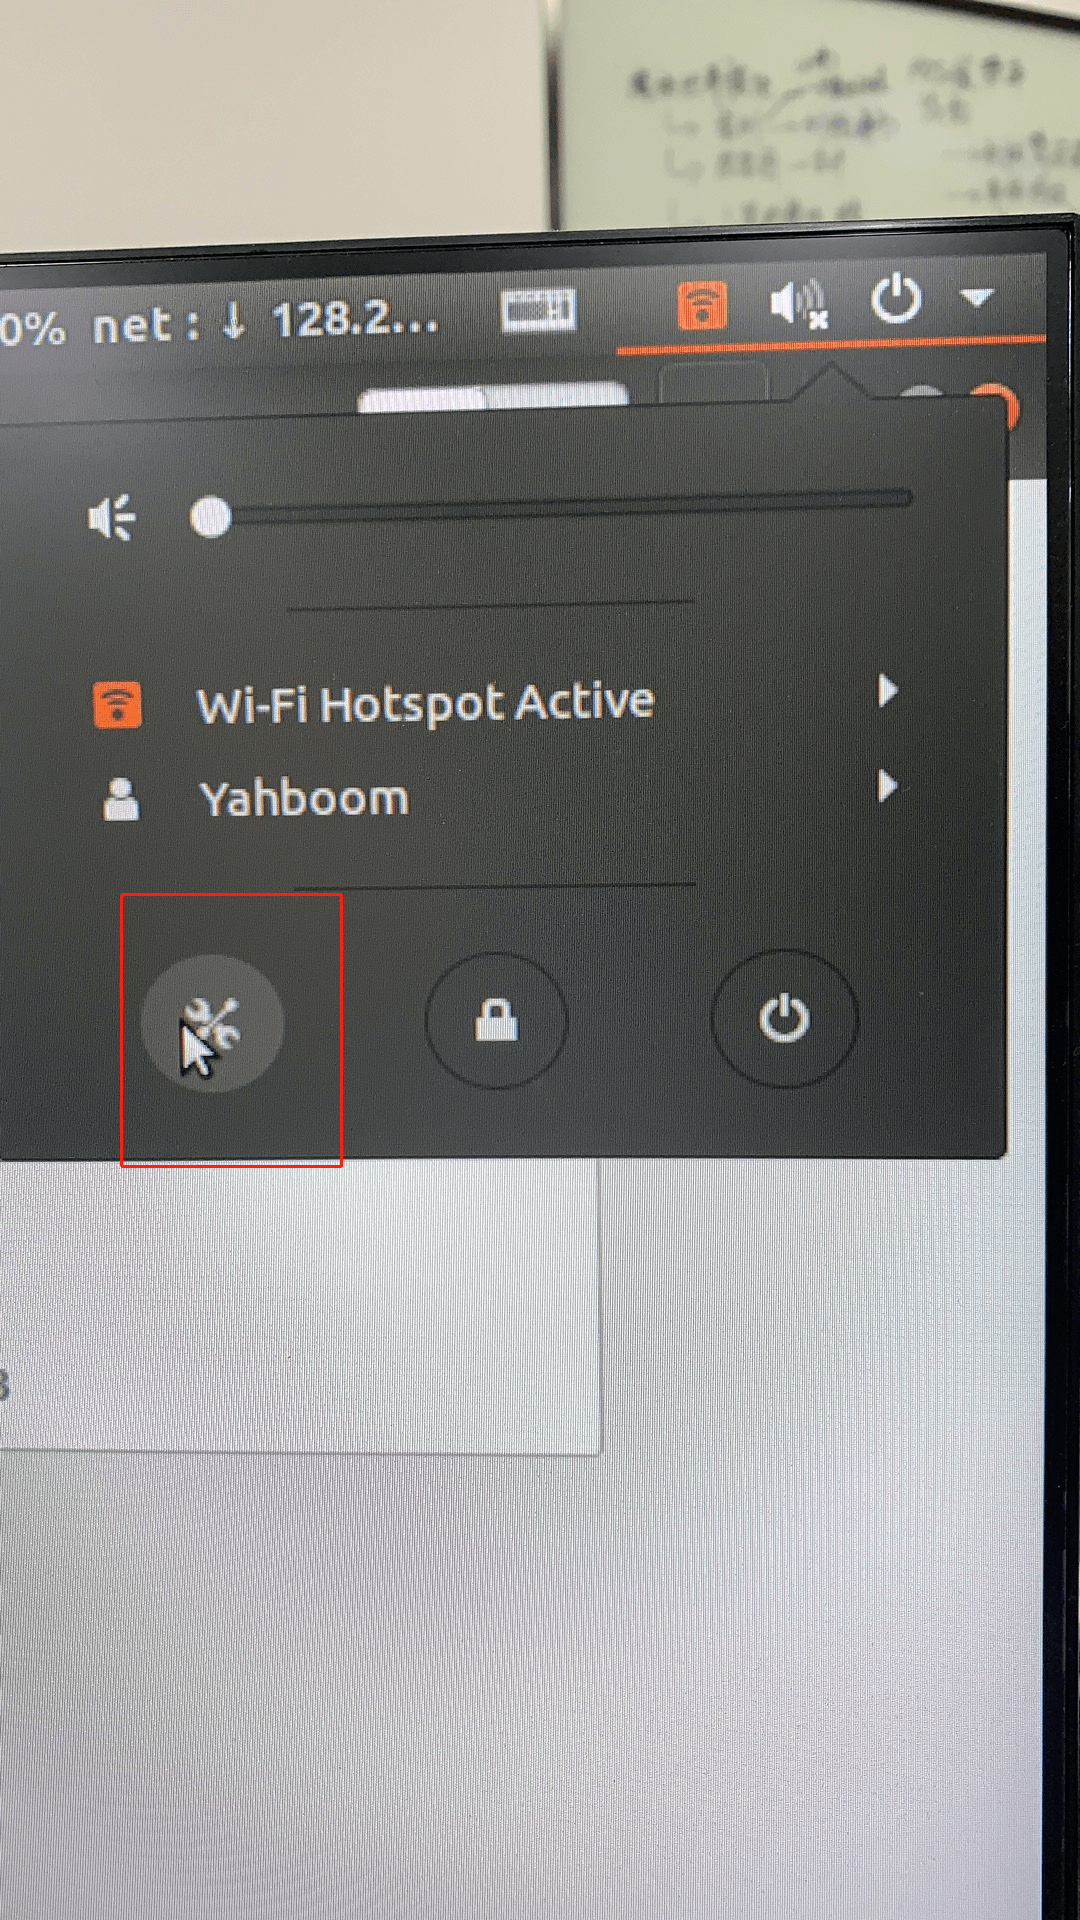
(1) This icon appears in the notification bar to indicate that it is in hotspot mode.

(2)Click on it and select following place.
(3)Then enter the settings, we select the Wi-Fi section, and then there is Visible Networks on the right, change the "ON" state below to "OFF", and click it.
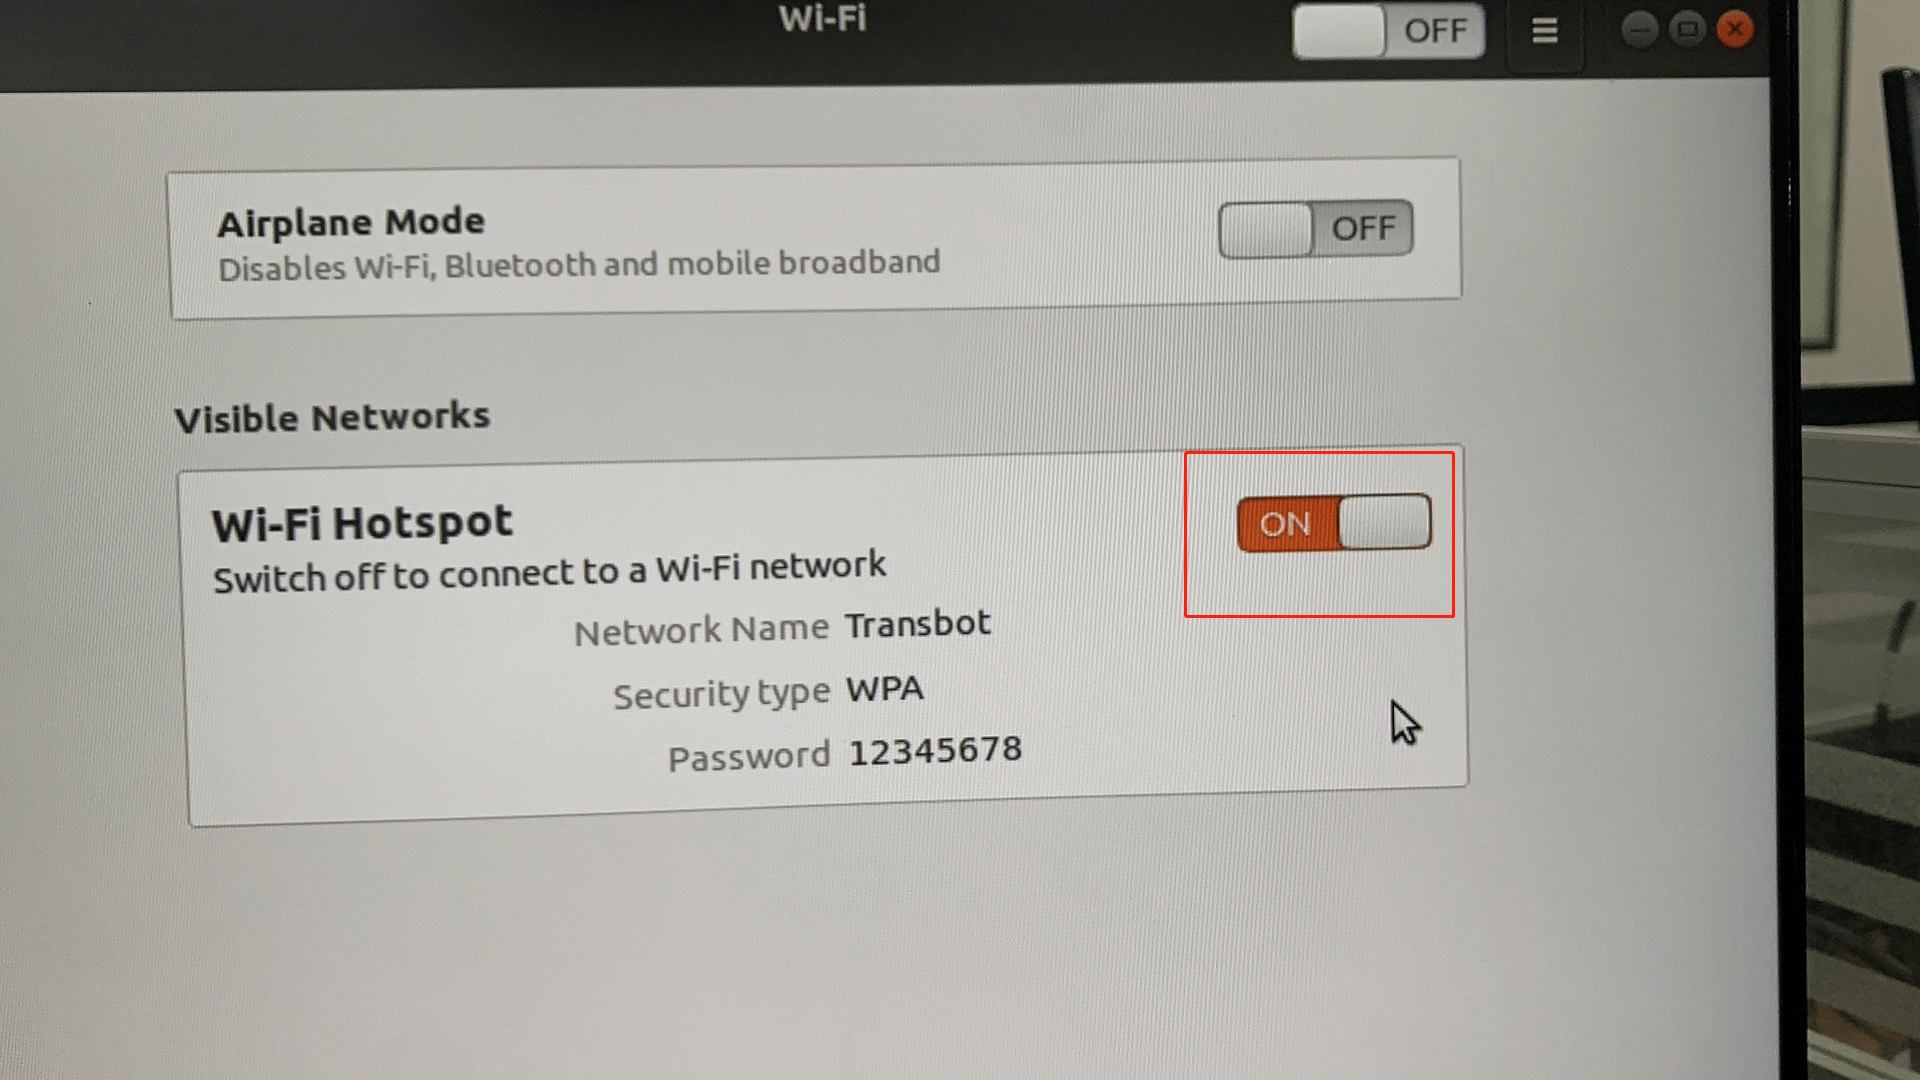
Then click "Stop Hosspot" to turn off hotspot mode.
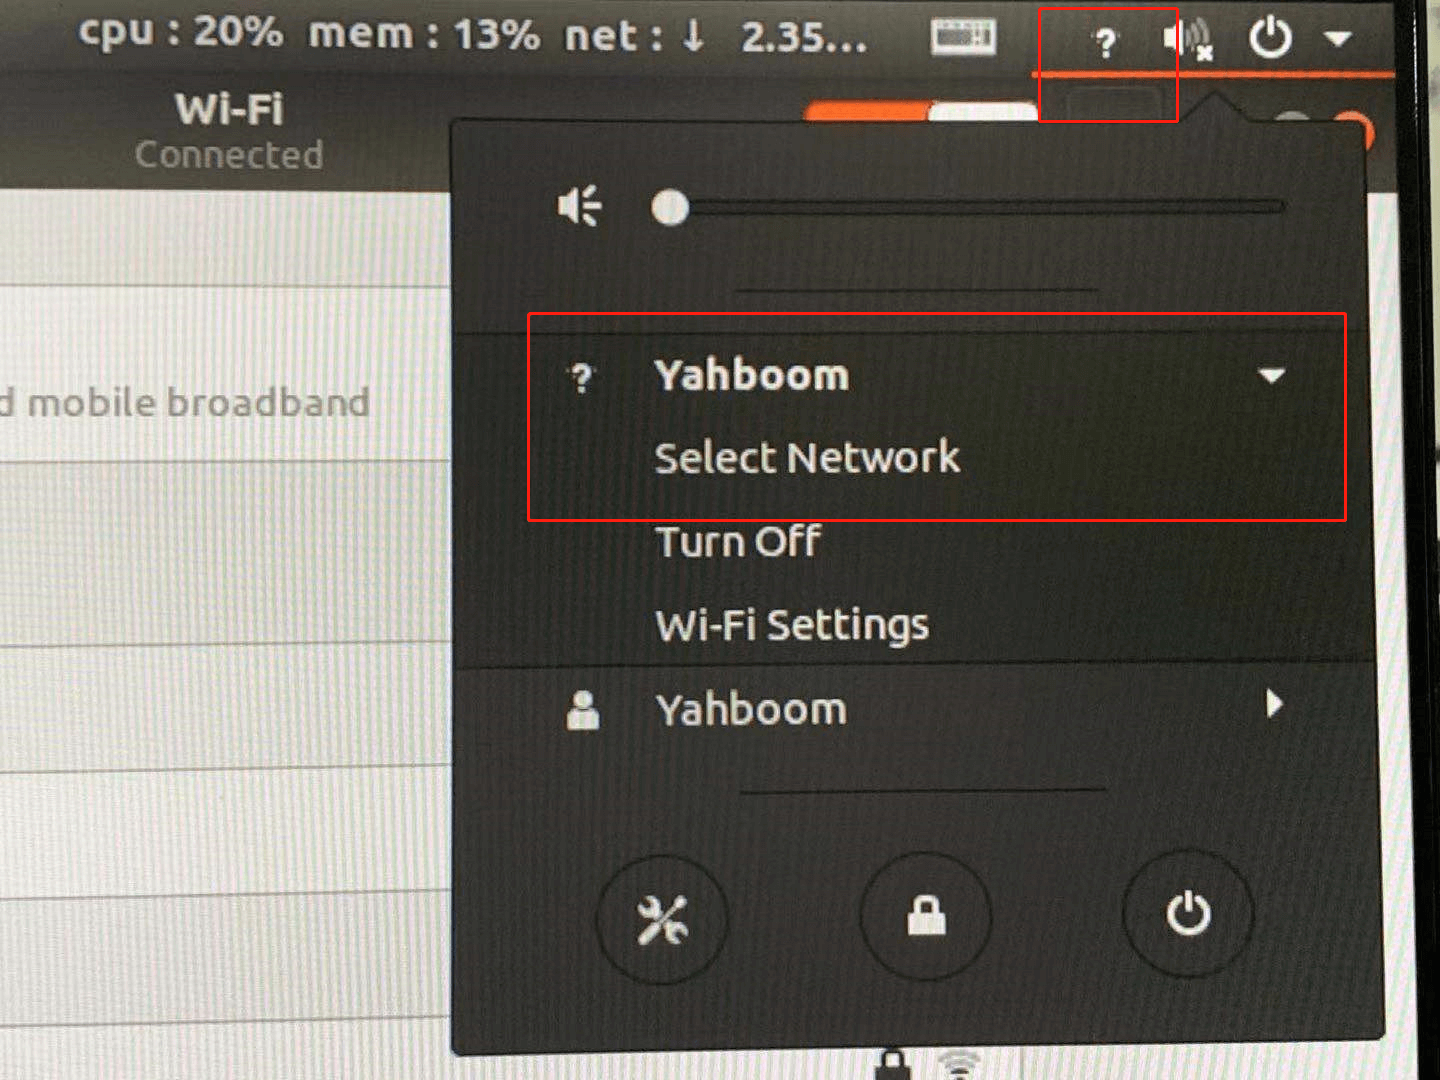
(4)Click the WiFi icon in the notification bar again and find that the hotspot mode is turned off at this time. Now that the WiFi is not connected, we can configure the network for Transbot through the APP.
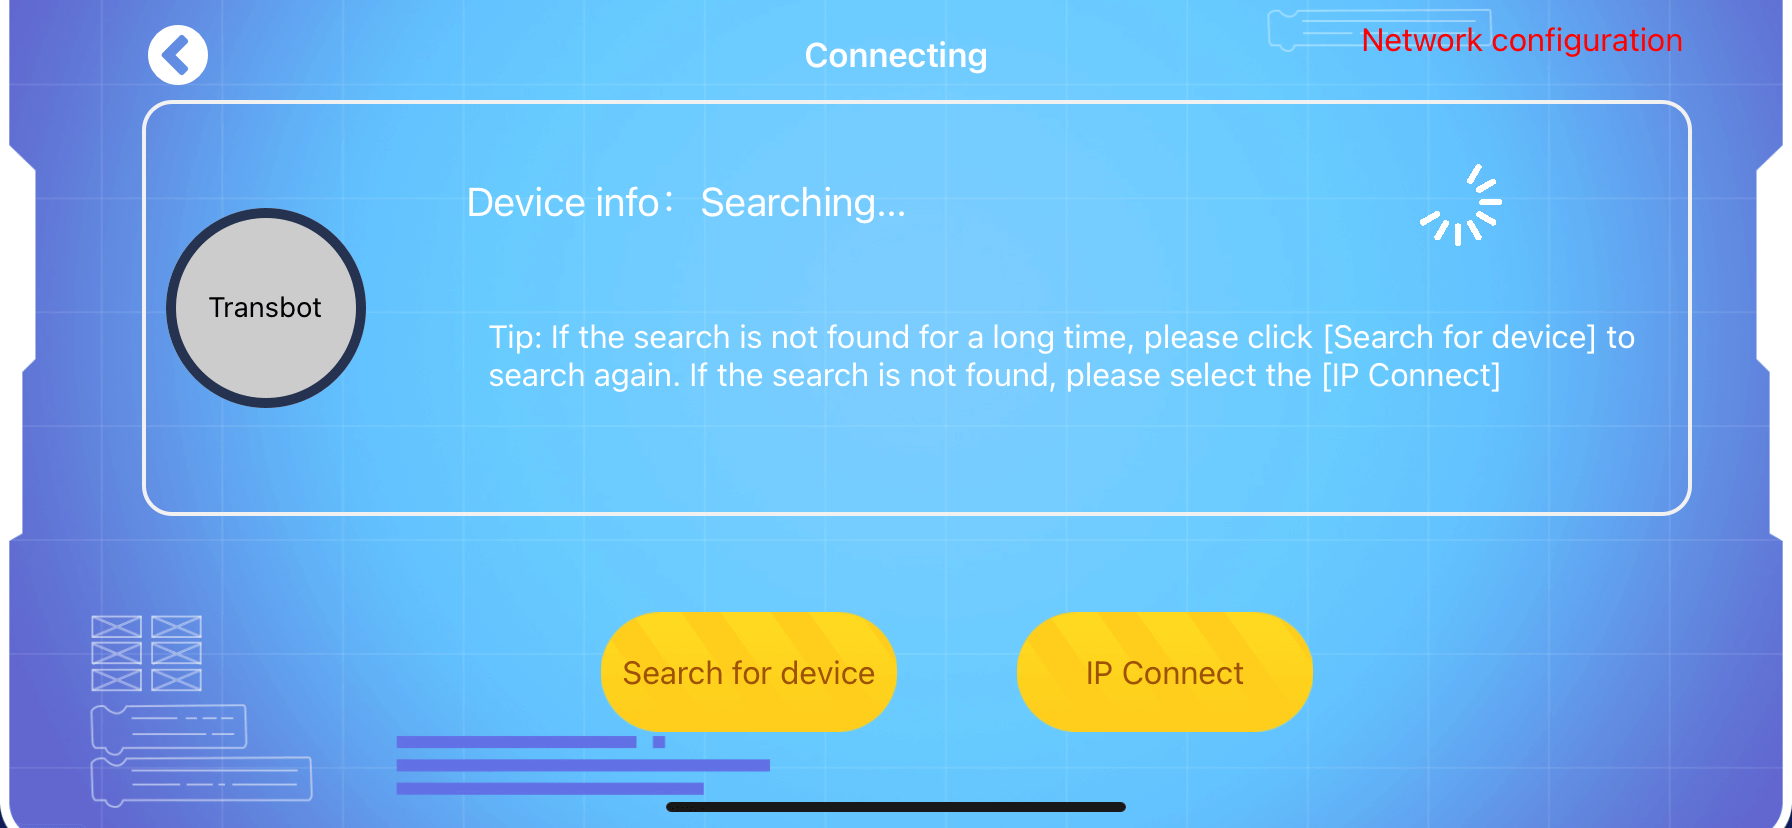
Step 1: Open YahboomRobot APP, choose [ROS Robot]--[TRANSBOT]. Click the [Network configuration] button in the upper right corner of the [Connecting] interface.
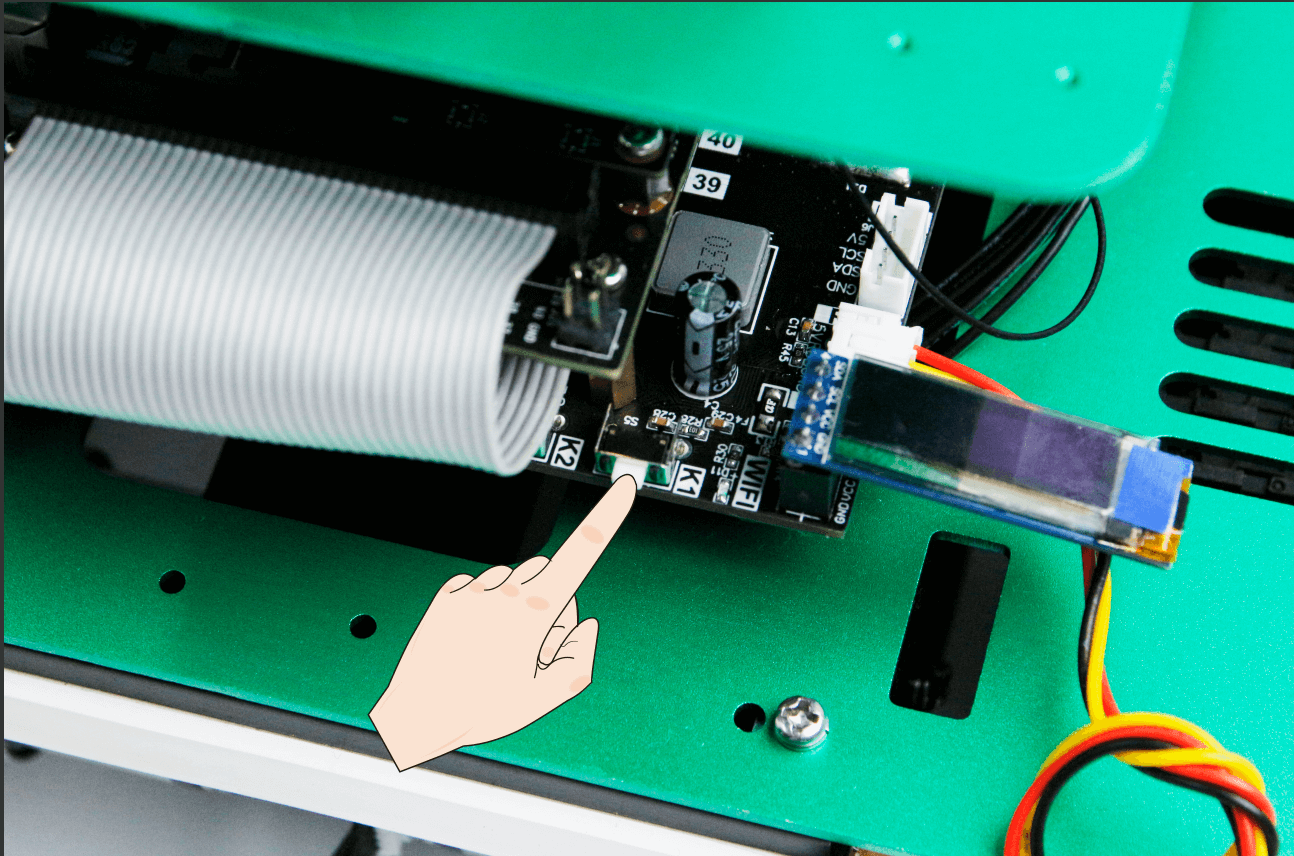
Step 2. After turning on the power of Transbot, wait for the system startup to complete (the buzzer beeps three times in succession), press and hold the K1 button on the expansion board for about 2 seconds to enter the WiFi network configuration mode.
At this time, the WiFi indicator flashes and the buzzer keep beeps , Click [Next].
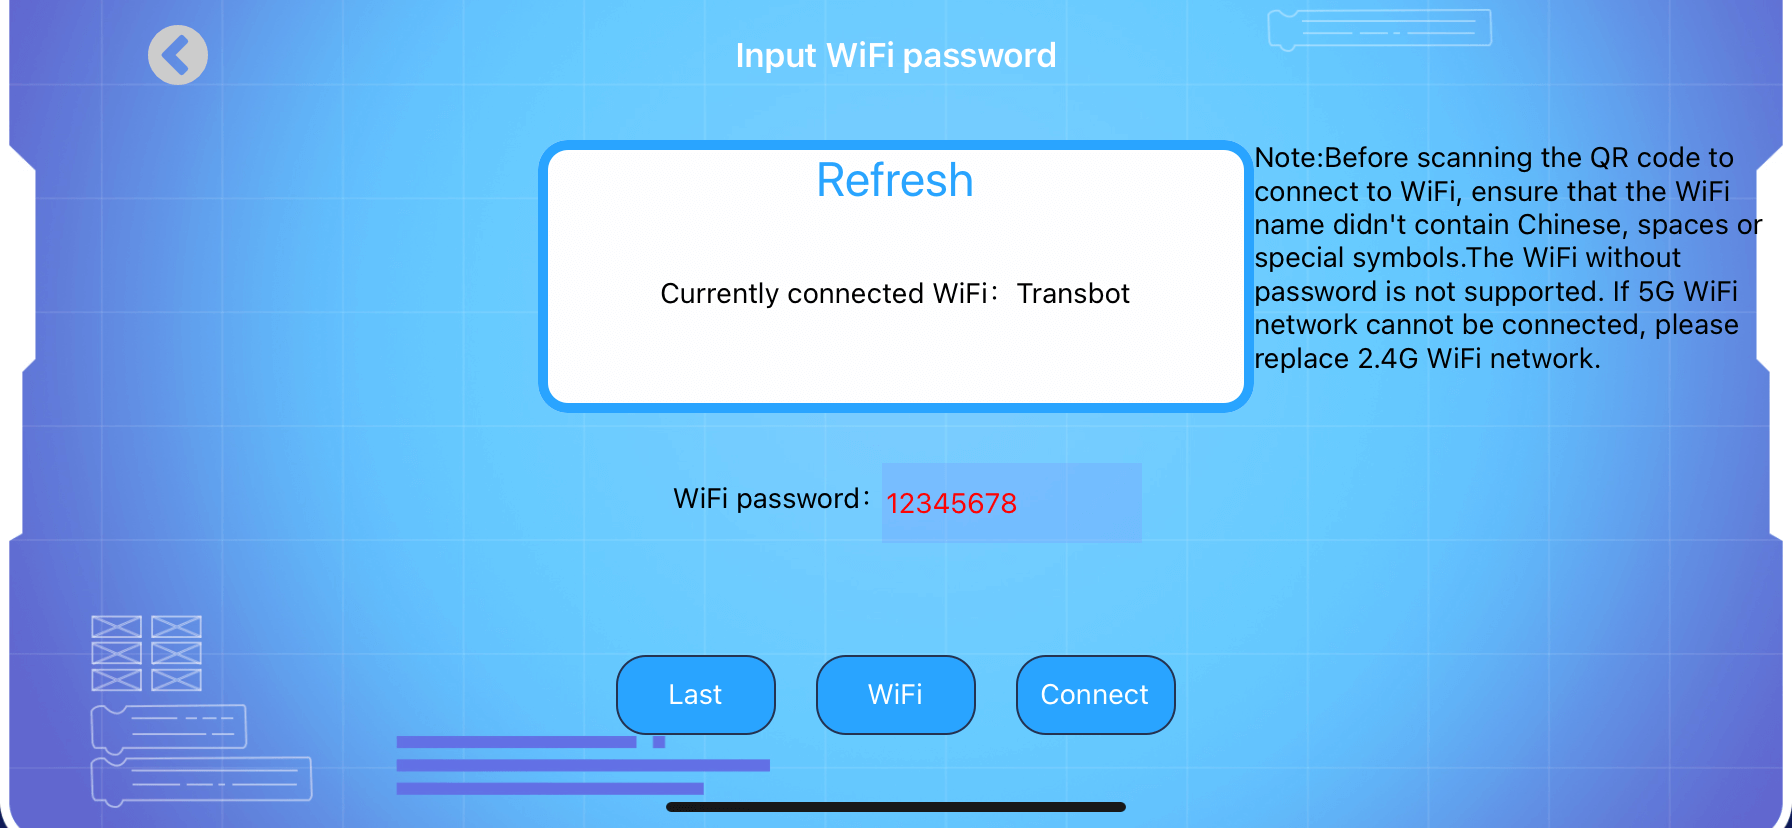
Step 3. If the current WiFi name is not displayed or displayed incorrectly, please click [Refresh]. If the WiFi is not currently connected, please click the [WiFi] button to enter WiFi connection interface on your phone.
Then, back to APP and input password of the WiFi connected to the mobile phone, click the [Connect] button to enter the next step.
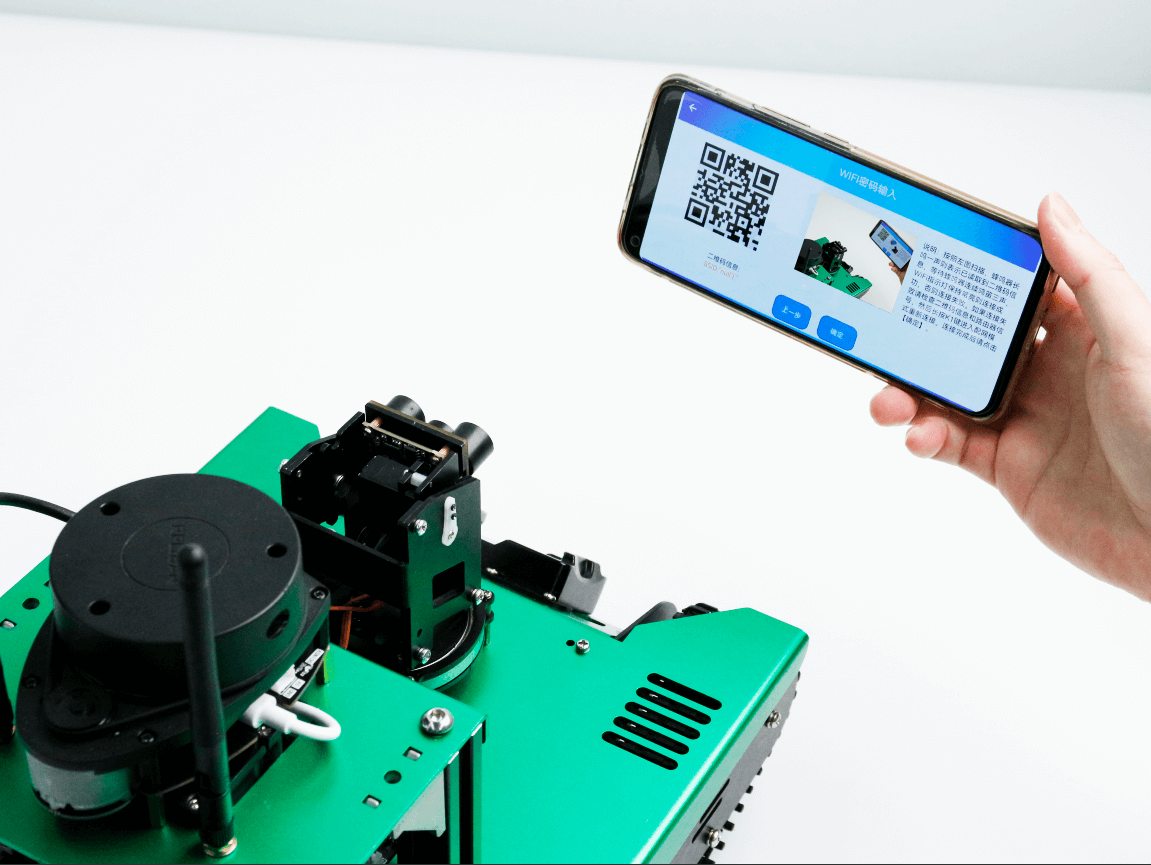
Step 4. At this time, the APP will automatically generate a QR code picture that records the WiFi information. As shown in the figure below, please place this QR code about 20 cm in front of the camera. Waiting for a long beep from the buzzer means that the QR code information has been read, and you can remove the phone at this time. Wait for the buzzer to beep three times in succession.
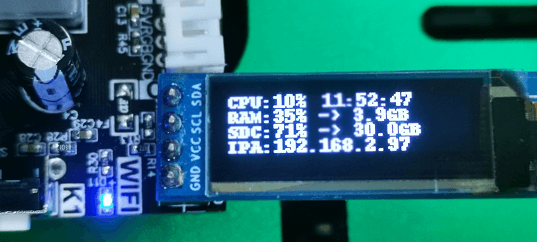
If the WiFi indicator keeps on, which means the connection is successful, and if it is off, the connection fails.
If the connection fails, please check the QR code information and router signal, and then long press the K1 button again to enter the network configuration mode and reconnect.
Step 5. Click [OK]. We can IP address on OLED.
3、Precautions
① The WiFi network configuration function of the camera can only be used when the Transbot APP process is started normally.
② If Transbot is currently connected to a WiFi network, and then use the camera WiFi network configuration function, you can also switch the WiFi network normally, but because the IP address needs to be assigned before ROS is started, some functions may be abnormal, please restart Transbot.
If the QR code WiFi information is wrong, it will cause the new WiFi network connection to fail and automatically connect back to the original WiFi network.
③ Please do not have Chinese or special symbols in the WiFi signal, otherwise it may cause abnormal connection.